- Celebrating 15 years of global event tech solutions
- | +16027370011
- | Hire@oneworldrental.com
How to Screenshot on Surface Pro: Quick & Easy Methods

How to Factory Reset Oculus Quest 2
February 19, 2025
How to Screenshot on a Dell Laptop
February 19, 2025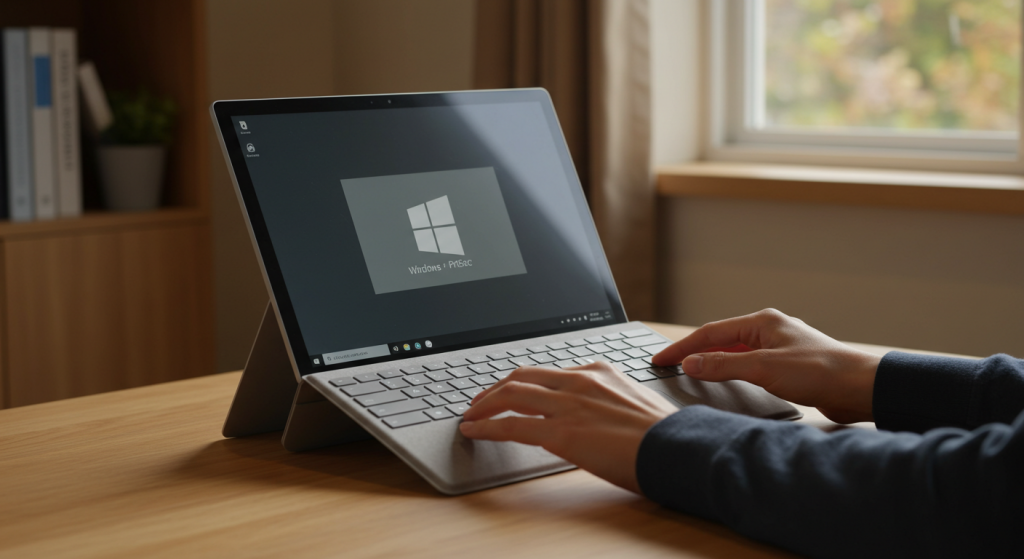
Introduction
Taking screenshots on a Surface Pro is simple with multiple built-in options. Whether you prefer using keyboard shortcuts, the Snipping Tool, or touch gestures, this guide covers everything you need to know to capture and save your screen efficiently.
Using Keyboard Shortcuts
Capture the Entire Screen
If your Surface Pro has a keyboard attached, press Windows + PrtScn. The screen will briefly dim, indicating that the screenshot has been saved in the Pictures > Screenshots folder.
If your Surface Pro lacks a Print Screen button, press Fn + Spacebar to capture the screen. You may need to paste the screenshot into an image editor like Paint or Word.
Capture the Active Window
To capture only the active window, use Alt + PrtScn. This will copy the screenshot to the clipboard, requiring you to paste it into an editing program.
Using the Snipping Tool & Snip & Sketch
The Snipping Tool is a built-in Windows utility that allows flexible screenshot options.
- Press Windows + Shift + S to open Snip & Sketch.
- Select from Rectangular Snip, Freeform Snip, Window Snip, or Fullscreen Snip.
- The screenshot is copied to the clipboard and can be edited or saved from the Snip & Sketch app.
Alternatively, open the Snipping Tool from the Start menu and choose your preferred screenshot mode.
Taking a Screenshot in Tablet Mode
If your Surface Pro is in tablet mode without a keyboard, use the following method:
- Press and hold the Power button + Volume Up button simultaneously.
- The screen will flash, confirming the screenshot.
- Find the saved image in Pictures > Screenshots.
Saving and Editing Screenshots
After taking a screenshot, you may need to edit or annotate it. Use Paint, Snip & Sketch, or Microsoft Photos to crop, highlight, or add text to your images. If using Snip & Sketch, click the notification popup after capturing to open the editor.
Troubleshooting Screenshot Issues
- If keyboard shortcuts aren’t working, check if the Fn lock key is enabled.
- Ensure you have enough storage space in Pictures > Screenshots.
- Restart the device if shortcuts become unresponsive.
Conclusion
Capturing screenshots on a Surface Pro is quick and easy with various methods. Whether using keyboard shortcuts, the Snipping Tool, or the power and volume buttons in tablet mode, you can efficiently save and edit your screen captures for any purpose.
One World Rental: Your Trusted Tech Rental Partner
If you need high-quality technology solutions for events, One World Rental provides Surface Pro rentals, laptops, iPads, and event tech solutions. With global service, rapid delivery, and 24/7 support, we ensure seamless technology experiences for businesses and events. Whether you need devices for conferences, training sessions, or corporate presentations, One World Rental has the right equipment to meet your needs. Contact us today for tailored tech rental solutions!


